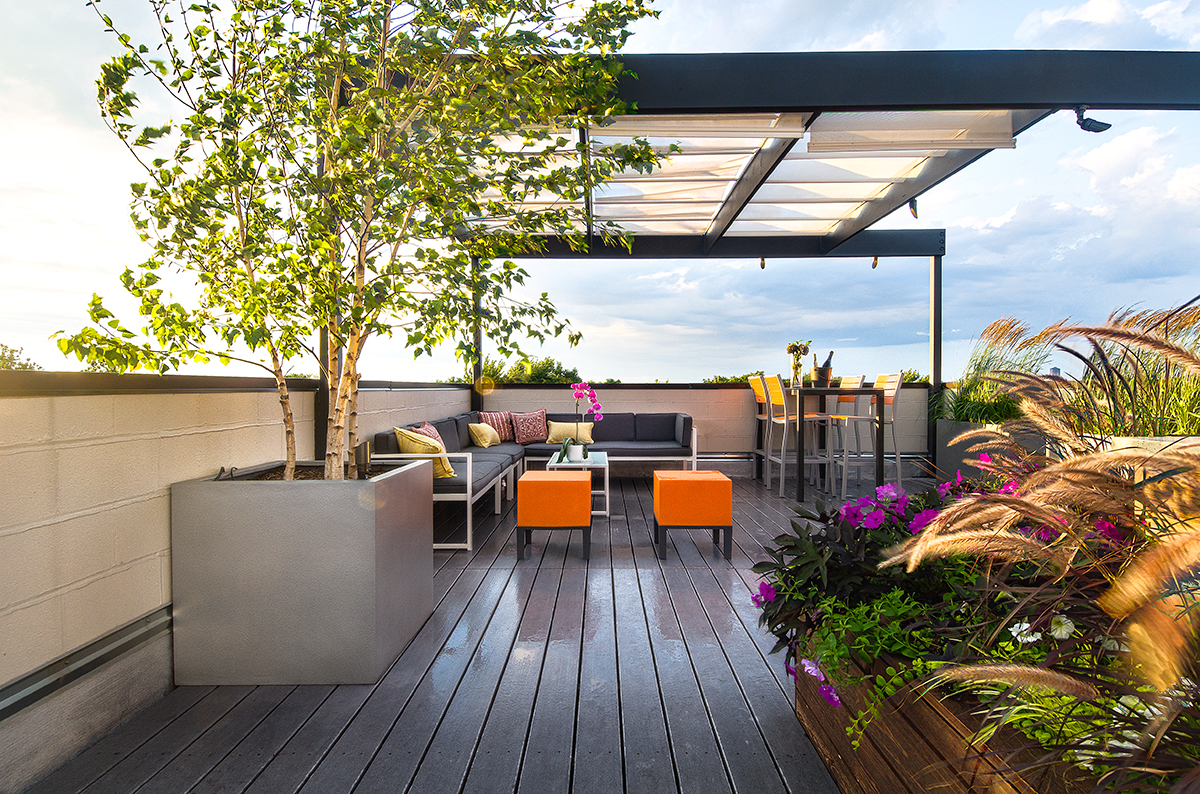
What Does Receiving Large Planters On A Pallet Look Like?
Posted by Jason Wyrwicz on Aug 23rd 2023
The arrival of your carefully chosen large planters is imminent, promising to elevate your home into a realm of natural elegance and awe-inspiring beauty. As you prepare to embrace these magnificent additions, envision the seamless fusion of design and nature that awaits, you may have some questions on how these glorious vessels going to ship to me. Do I need to do anything special to receive them? Fear not, I am here to tell you more than you ever wanted to know about shipping & receiving planters on a pallet.
What do I need to do prepare for the arrival of our planters?
Measure the designated area:
Ensure that the space can accommodate the size of the large planters you have ordered. If you have made a mistake and ordered something too big for your space, or something that will not fit thru a doorway, just let us know and we can get the order cancelled and switch you into a planter pot the right size for your space. Ideally you would do this prior to shipment so that materials / labor / gas isn’t spent un-necessarily.
Pro Tip: You can get a feel for the size of the planter in your space by marking the floor with painter’s tape, cutting used shipping boxes (we all have too many Amazon boxes in our house, right?), or just laying pillows / couch cushions down to mark off the appropriate space. This helps you visualize how the planter will sit.
Clear the pathway:
Make sure the path from the delivery point to the installation area is clear and free from obstacles. When you (or the delivery people if you selected premium shipping) are bringing the planters to the final installed location, you don’t want to have your furniture, tables, lamps, etc. bumped into.
Pro Tip: Think about everything you will need to move to the install location and plan accordingly. Planters, Potting Soil (Always use potting soil in our planters, not soil meant for the ground), void fill, plants, etc. Our planter pots can get really big, up to 6’ cubes on standard sizes, so you will have a lot of sundries involved in getting these planted. P.S. If you are planting a tree in a planter in the back yard, you will probably need a crane, gantry, or large piece of equipment to raise it into the planter. Keep that in mind.
Notify relevant parties:
Inform household members, neighbors, landscape installers or any necessary personnel about the planned delivery to avoid any inconvenience. Usually this isn’t a big deal, but occasionally you need to be a good neighbor and inform people you will be blocking the common space for a bit of time. If it is your own house, probably not a big deal. If you are using an elevator in a condo building, you would want to reserve it ahead of time. If you are blocking a city street for a crane to lift your planters onto the rooftop, then you probably have it all figured out already (or your landscaper does.)
Pro Tip: Make sure you have the correct permits if you are blocking a city street. Trust me, you do not want to roll the dice on that one.
How is the shipment coming to me?
Shipment step 1
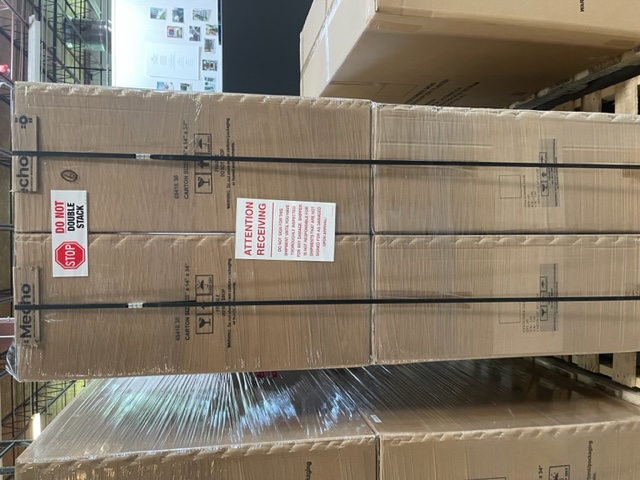
After your planters are finished to-order, our team carefully inspects and packages each planter. The planter is wrapped in paper then placed in a cardboard box surrounded by insulation panels on all sides. The boxes are placed on appropriately sized pallets so that no box hangs over the edge of the pallet. Each planter comes in one box, no boxes contain multiple planters.
Pro-Tip: Hanging boxes over the edges of a pallet is a sure way to incur damage between the factory and the customer. We are not sure why some companies still do this. Perhaps they prefer their bottom line over your happiness?
Shipment step 2
The shipment is picked up from our finishing facility typically by Fed-Ex Freight. They have a great program for delivering pallets of products to residential or limited access customers.
Pro-Tip: If you choose the premium shipping option, they will even bring the boxes to a spot of your choice and remove the packing / pallet.
Shipment step 3
Fedex will call to schedule an appointment for delivery and they will bring the pallet (or pallets) on a truck with a liftgate. Our shipping is included in the pricing online and there will be no hidden charges. Other companies may try to bill you after the fact for liftgate services if you didn’t specify at the time of order. I think that is B.S., and will not tolerate it at Pots Planters & More.

Pro-Tip: Make sure your address is correct when you place the order. Freight companies will charge a re-delivery fee if they attempt a delivery and then you want to change the address after the fact. If you know it needs to go somewhere other than what you selected upon ordering, just let us know before the delivery is attempted and it can be fixed quite easily.
Inspecting the Shipment
Check the exterior of the packaging for any signs of damage or mishandling. Count the number of pallets & packages and make sure they align with what is written on the Bill-of-Lading.
While we pack our planters and pallets with best-in-class packing practices, occasionally things do not go the way we planned. If there is a hole in a box (especially two side by side), and aggressive forklift driver at the transportation company may have pushed the pallet with their forks and scratched / put a hole in your planter. Does it happen often? No. Have I seen things that boggle the mind in my many years of making planters? Yes.
Either way, just snap a few pictures (pictures of damage make filing a claim much simpler), and note on the bill-of-lading (the paper the carrier makes you sign for receipt of product) any damages to the outside of the boxes. This way if there is any damage to the planters, the claim process will be much easier. If the carrier tries to deliver something that looks like it has been crushed, smashed by the hulk, or just down right wrong, take a few pictures and refuse delivery.
Pro Tip: We will take care of filing the claim and pulling back any damaged product and have new product shipped out to you if there is an issue. You will probably never have to do this, but I did promise you I would tell you more about receiving planters than you ever wanted to know.
Unpacking and Placement
Determine the location:
Decide where the large planters will be placed, considering factors such as sunlight exposure, space accessibility, and aesthetics. We already covered this, but you will want to make sure you have the planter pot in the final place before you begin putting in potting soil and plants. While our planters are lightweight and easy to move, once filled with wet soil they can get weight over 1000 plus pounds (Yes, we design our planters to hold this much force. There is a lot of science behind the art of planters)
Unpack carefully:
Remove the packaging materials, ensuring not to damage the planters during the unpacking process. You do not want to go ham of on the box with a sharp blade. While there is a 1” or so padding in place around the planter, you will be quite disappointed if you push a sharp blade into your planter.
Pro Tip: If you open the bottom of the box and pull the flaps out, you can place the planter, bottom side on the ground, and slide the box off the top, rather than lift the planter out of the box.
Inspect for concealed damages:
Check the planters for any hidden damages that may not have been apparent upon initial inspection. If there are, take a picture and send it to our customer service team. Our general inbox is sales@potsplantersandmore.com and this is monitored by our crack team of planter specialists that can help you with any issue that may arise.
Planter Installation
There are three very important considerations before you install your planters.
Drainage Holes
If you are installing the planters outside you need to have drainage holes. If there are none you will void the warranty. Why? Because, while our planters are rated for high loads, the amount of weight and pressure a large planter full of water has, will eventually cause a failure in the structure and create bowing. You see this often on cheaper large planters, but can even see this on a well-built planter if there aren’t drainage holes.
Incoming wall of math: How much pressure is it? Water weighs about 62 lb per cubic foot. One of our most popular planter boxes, the 48” Potsdam, measures at 48”L x 16”W x 32”H, for a volume of 14 cubic feet, which would be 868 lb of just water. One of our larger planter boxes, the 72” Perth measures at 72”L x 16”W x 42”, for a volume of 28 cubic feet, which would be 1736 lb of just water. As you can see it is quite a lot, and this problem could be amplified during a freeze if that water couldn’t drain and turned to ice. In short: Just install drainage holes (If you do not want it draining out the bottom, ask us and we can put holes on the sides, or you can work with a landscaper to install drainage tubes that can be moved to a more discrete area for drainage)
Keep the boxes dry until you remove the planters:
What? I thought these were outdoor planters. Yes, they are meant to be outdoors and you will not be disappointed. However, we found that if the planters are left in the boxes, and the cardboard gets soaked, the humid box that they will sit in causes a slow reaction with the painted finish which could cause bubbles to form in the paint. If the planters are removed from the boxes, this does not happen. Whoa, whoa, whoa…. What do you mean bubbles in the paint? As you may know, we finish each planter to order, and while the paint is cured to the touch and can be handled (moved, installed, etc.) in some rare circumstances during the first 30 days after manufacture (i.e. in a wet cardboard box) there is a chemical reaction where the water from the box gets absorbed under the paint film. It happens very infrequently, and only when someone has left the planters in a wet box for a long time. We put the warning out to make sure you, our valued customer, is not disappointed.
Our Ideal Method To Plant a Planter:
Step 1.
Make sure you have drainage holes in the bottom if you are planting outside (Yes, it is that important I am repeating myself.)
Step 2.
Add a layer of landscape fabric to the bottom of the planter.
Step 3.
Add a layer of lightweight drainage material on top of the landscape fabric. This could be light weight rocks like lava rocks, you could re-use Styrofoam and save it from the landfill, or use similar filler materials. If you are concerned about your planter being too top heavy (you can add a cinderblock or two at the bottom, as long as you do not cover the drainage holes).
Step 4.
Add a layer of landscape fabric over filler material.
Step 5.
Add your potting soil. Consult a landscape professional for the depth of soil you need for the plants you plan on adding. Some plants can thrive in 6” deep soil, while others have much deeper roots, so you need to plan accordingly.
Pro Tip: Why do you keep saying potting soil? Isn’t all soil the same? Well potting soil is specially formulated to allow for better drainage and less water retention then typical top-soil. This reduces the weight and stress on the walls of you planter, while allowing the roots of your plants to breathe and not drown in excessive water.