How to Fill a Large Planter (And What to Put in the Bottom)
Posted by Jason Wyrwicz on Nov 25th 2025
Big planters make a huge impact in an entryway, courtyard, lobby, or garden, but all that empty space inside can be confusing. Do you really need to fill it with potting soil from top to bottom? How do you keep the planter light enough to move or heavy enough not to tip over? And how do you make sure your plants actually thrive in a real-world setting instead of just on install day?
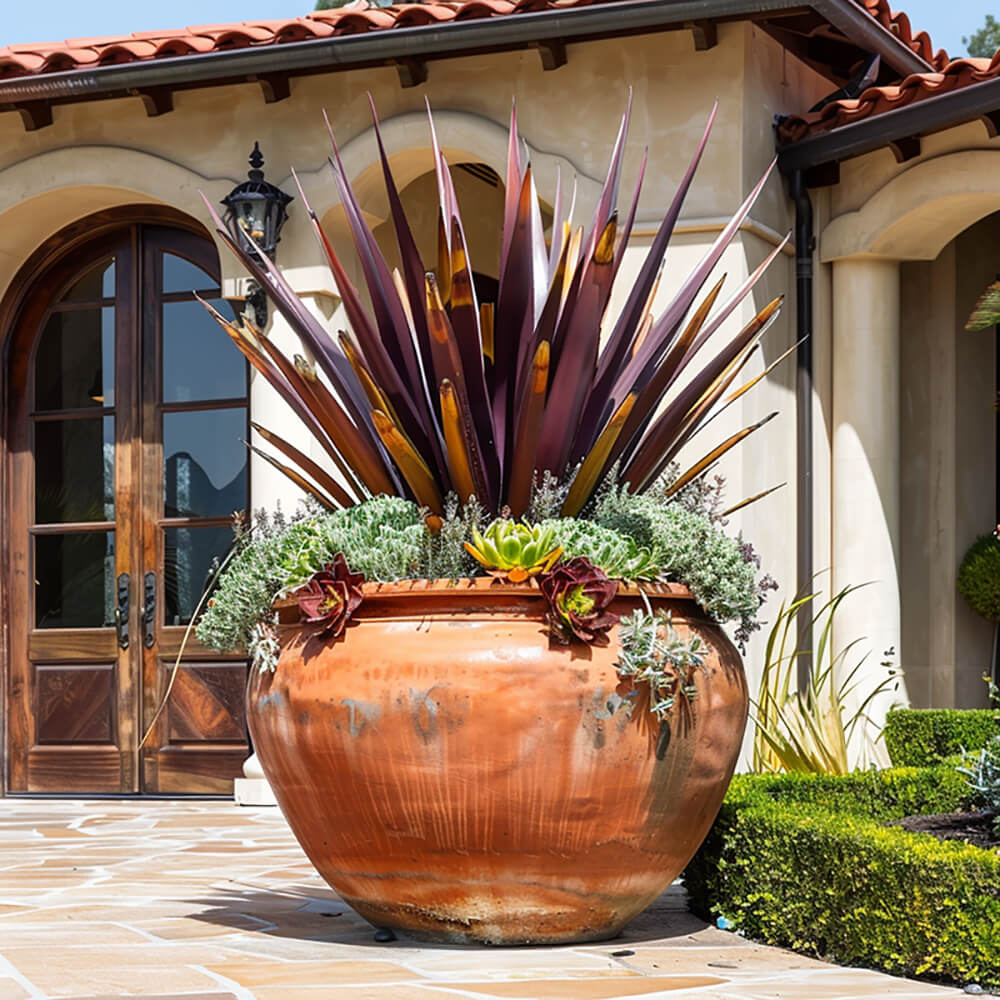
This guide walks through what to put in the bottom of a large planter, how to layer fillers and soil, and how to dial in drainage so plants stay healthy and presentable over time, whether the planter lives at a front door or on a rooftop.
Step 1: Decide How Much Soil You Really Need
Before you start filling, think about the plants or trees you are using and where the planter will live.
- Root depth: Trees and large shrubs need more depth than annual flowers or shallow-rooted plants.
- Container size: Very tall or wide planters often have more volume than your plants will ever use.
- Indoor vs outdoor: Outdoor planters may need more weight in the base to cope with wind and foot traffic, while indoor planters are often easier to move if they are kept lighter.
If the roots will only ever use the top third or half of the planter, you can safely fill the rest with other materials instead of expensive potting soil, especially in large commercial planters that have serious volume to work with.
Step 2: Choose the Right Category of Pot Filler
There are two big choices to make.
- Should your planter be easy to move or anchored in place?
- Do you want fillers that break down over time or that last for years?
Lightweight Pot Fillers (For Planters You Need to Move)
Use these when your planter is already heavy or when you expect to rearrange your layout regularly. This is common on balconies, terraces, and flexible retail or restaurant patios.
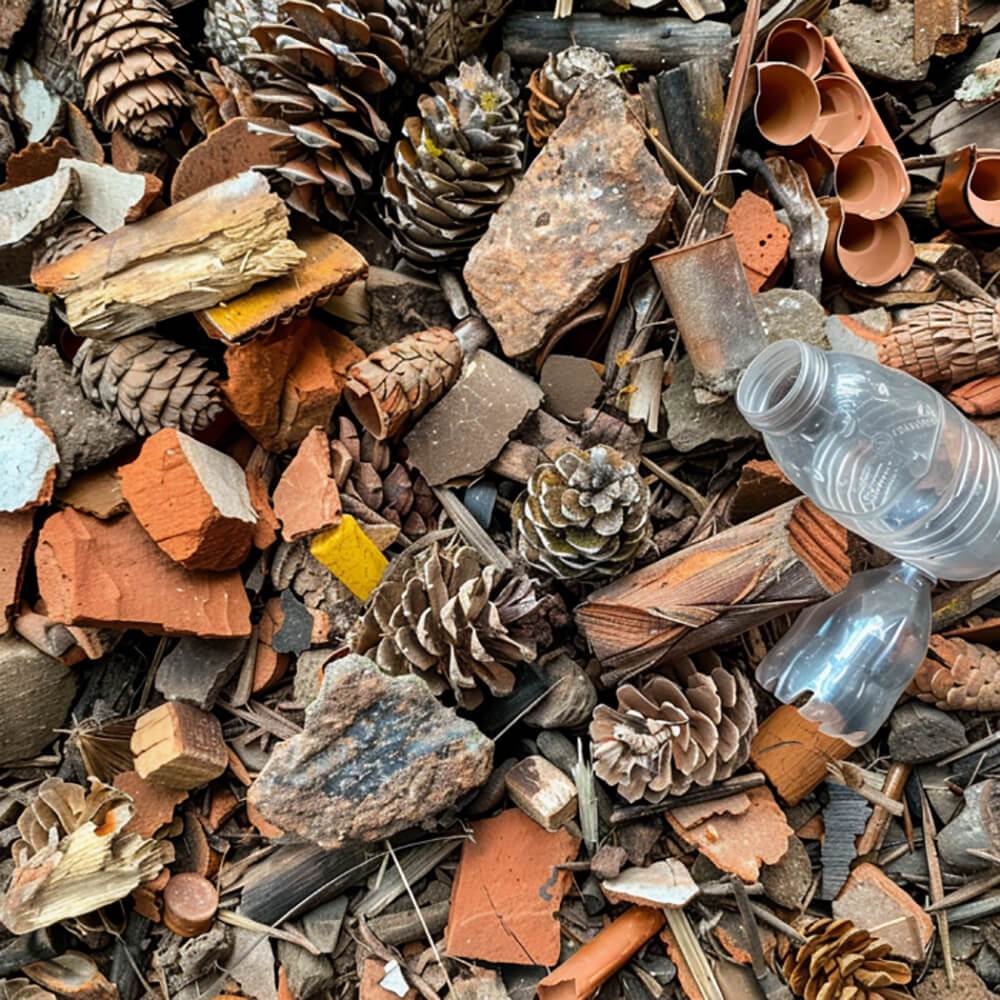
Compostable lightweight fillers
- Pinecones
- Wood chips or bark
- Leaves and small sticks
- Coconut coir or fiber
- Shredded or torn cardboard
- Waste paper and newspaper
- Paper cups and packaging scraps
- Sphagnum moss
These materials gradually break down, which is perfect for seasonal planters that you empty and refresh on a regular schedule.
Long-lasting lightweight fillers
- Empty plastic bottles, milk jugs, or food containers
- Clean grocery or shipping bags bundled up
- Foam blocks
- Packing peanuts that do not dissolve in water (avoid corn-based peanuts that turn to mush)
- Crushed aluminum drink cans
- An empty potting soil bag stuffed into the base
- Small plastic nursery pots placed upside down
To keep small pieces from shifting, it is often easier to pack them inside a mesh bag, old pillowcase, or plastic bag with a few drainage holes punched into it. That also makes it faster to swap fillers when you reconfigure layouts.
Heavy Pot Fillers (For Planters That Stay Put)
Use these when you want the planter to feel solid and stable, for example in windy spots, exposed rooftops, or busy public areas near doors and walkways.
Compostable heavy fillers
- Short wood logs
- Tree branches and thick prunings
- Chunks of old untreated lumber
- Broken ceramic pieces from old pots
Long-lasting heavy fillers
- Gravel or crushed stone
- Sand
- Large rocks or river stones
- Glass pebbles
- Broken concrete pieces
- Empty beer or wine bottles laid on their sides
These materials add weight and stability while still allowing room for water to drain through the bottom of the planter.
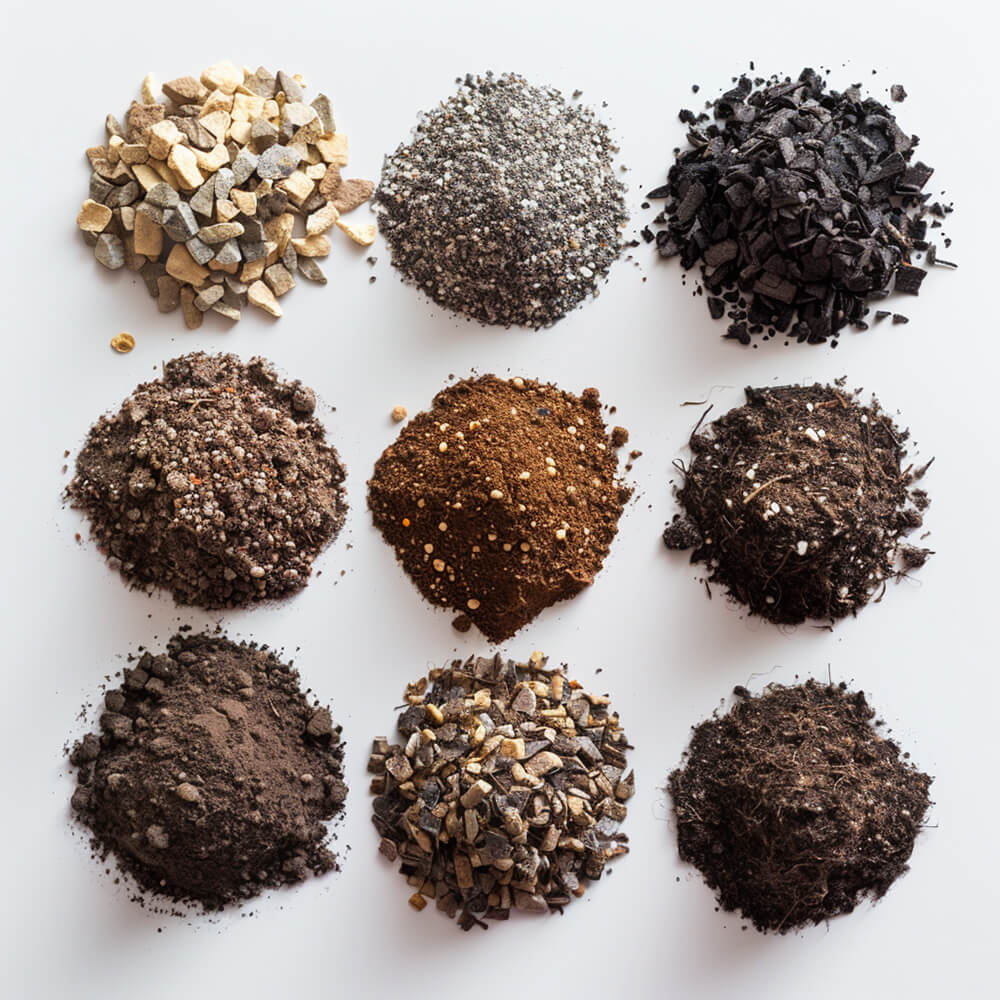
Step 3: Choose a High-Quality Potting Mix

The soil in the top section of your planter is where your plants do all their growing, so this is not the place to cut corners.
- Use potting mix, not garden soil. Soil taken from the ground can be heavy, compacted, and full of weed seeds or pests. It also drains poorly in containers.
- Look for a blend designed for containers. Good mixes are light and airy but hold moisture without staying soggy.
- Common ingredients you might see include coir, bark, compost, sphagnum peat moss, perlite, and vermiculite.
Mix in extra perlite or vermiculite if you want to improve drainage and keep the soil from compacting over time, especially in deeper planters where water can settle.
Step 4: Layer the Bottom of the Planter
1. Check drainage holes
Make sure your planter has drainage holes. If not, drill or add them according to the planter material. Without drainage, water will pool at the bottom and roots can rot, no matter how good your potting mix is.
2. Add a drainage layer
Start with a few inches of coarse material in the very bottom of the planter. This creates air pockets so excess water can escape.
- Gravel or small rocks
- Glass pebbles
- Broken pottery or ceramic pieces
- Recycled plastic pieces that will not compress
3. Add your chosen pot filler
On top of the drainage layer, add the filler materials you selected earlier. This layer can take up a large portion of the planter volume, depending on how deep your plant roots need to grow.
- Use lightweight fillers for planters you might want to move.
- Use heavy fillers for planters that need extra stability.
4. Add a filter layer
Cover the filler with a sheet of landscape fabric, weed barrier, or a piece of breathable burlap. This keeps soil from washing down into the filler while still letting water pass freely.
5. Fill with potting mix
Add potting mix on top of the filter layer until the planter is almost full. Leave a couple of inches of space between the soil surface and the rim of the planter so watering is easy and does not overflow onto paving or flooring.
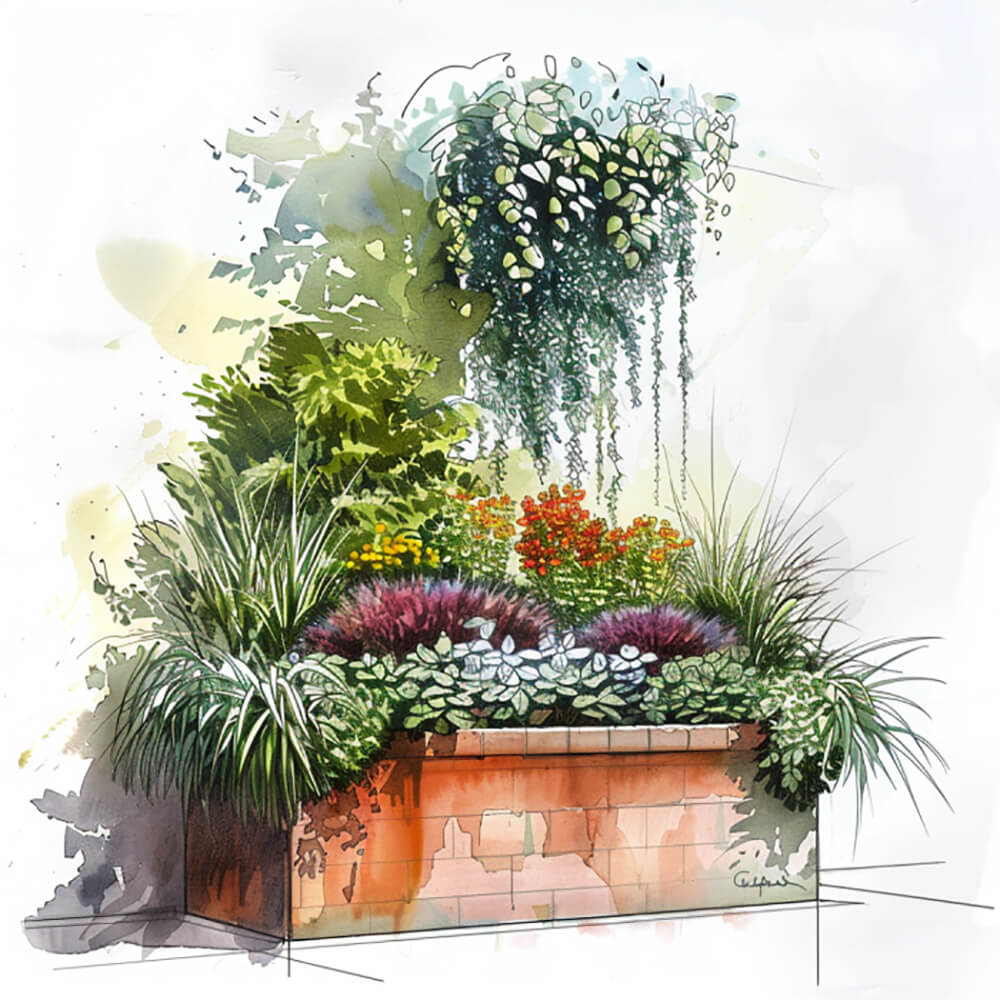
Step 5: Arrange and Plant for Maximum Impact
Now the fun part: planting.
- Think in layers. Place taller plants in the center or toward the back, medium plants in the middle, and trailing plants toward the edges so they can spill over the sides.
- Mix heights, colors, and textures. Combine spiky, mounding, and trailing plants with contrasting foliage for a rich, full look.
- Respect spacing. Give each plant enough room to grow so they do not have to compete too hard for water, light, and nutrients.
- Match light needs. Group plants that all like the same sun or shade conditions and similar watering requirements.
Step 6: Fine-Tune Drainage and Watering
Good drainage and smart watering habits are what keep your planter looking great long term.
Tips for better drainage
- Add perlite or vermiculite to the potting mix to increase air pockets around the roots.
- Make sure the drainage holes are clear and not blocked by the surface beneath the planter.
- If possible, create a very slight slope inside the planter so excess water naturally moves toward the drainage holes.
Watering the right way
- Water deeply until it starts to drain from the bottom, then let the soil dry out slightly before watering again.
- Test the soil with your finger. If the top inch feels dry, it is usually time to water.
- Avoid a constant light sprinkle, which can encourage shallow roots and weak plants.
- During hot or windy weather, you may need to water more often. In cool or shady spots, you can space out watering.
Quick Reference: Filler Combinations That Work Well
- For easy-to-move planters: Drainage layer of small rocks, then a mix of empty plastic bottles and foam blocks in bags, topped with landscape fabric and potting mix.
- For permanent outdoor planters: Heavy base of gravel or rocks, then a mix of broken ceramic pieces and logs, topped with fabric and potting mix enriched with compost.
- For seasonal displays: Coarse wood chips, pinecones, and cardboard boxes crushed down, then fabric and potting mix. When the season ends, the whole contents can be composted.
Ready to Fill Your Planters?
With the right fillers, soil mix, and layering, your large planter can be both cost effective and high performing. Whether you want a lighter container for a balcony or a heavy planter that anchors a commercial entrance, these steps help you build a healthy foundation for your plants.
If you are still looking for the right container, explore our collection of large planters designed for real projects in a wide range of sizes, finishes, and shapes, or ask about our trade and wholesale planter program for volume projects.